Building a Personal Blog with Notion Design Thinking Business Model Remote Work Company Culture Independent Operation Innovation Productivity
Introduction#
At the beginning of 2023, I decided to change the hosting method for my blog, seeking a more convenient approach. As a heavy Notion user, I discovered NotionNext.
First, let me introduce NotionNext. It’s a static blog built with NextJS + Notion API, supporting multiple deployment options. It requires no server, and setting up a website is very straightforward.
We will use Notion as the database to store articles, Github + Vercel as the management and deployment tools, and NotionNext’s code rendering to display our posts, creating a blog website.
So, let’s get started!
📝 Deployment#
Preparations#
1. Fork the NotionNext Code#
First, prepare your Github and Vercel accounts. Then, go to the NotionNext repository on Github and fork it to your own account.
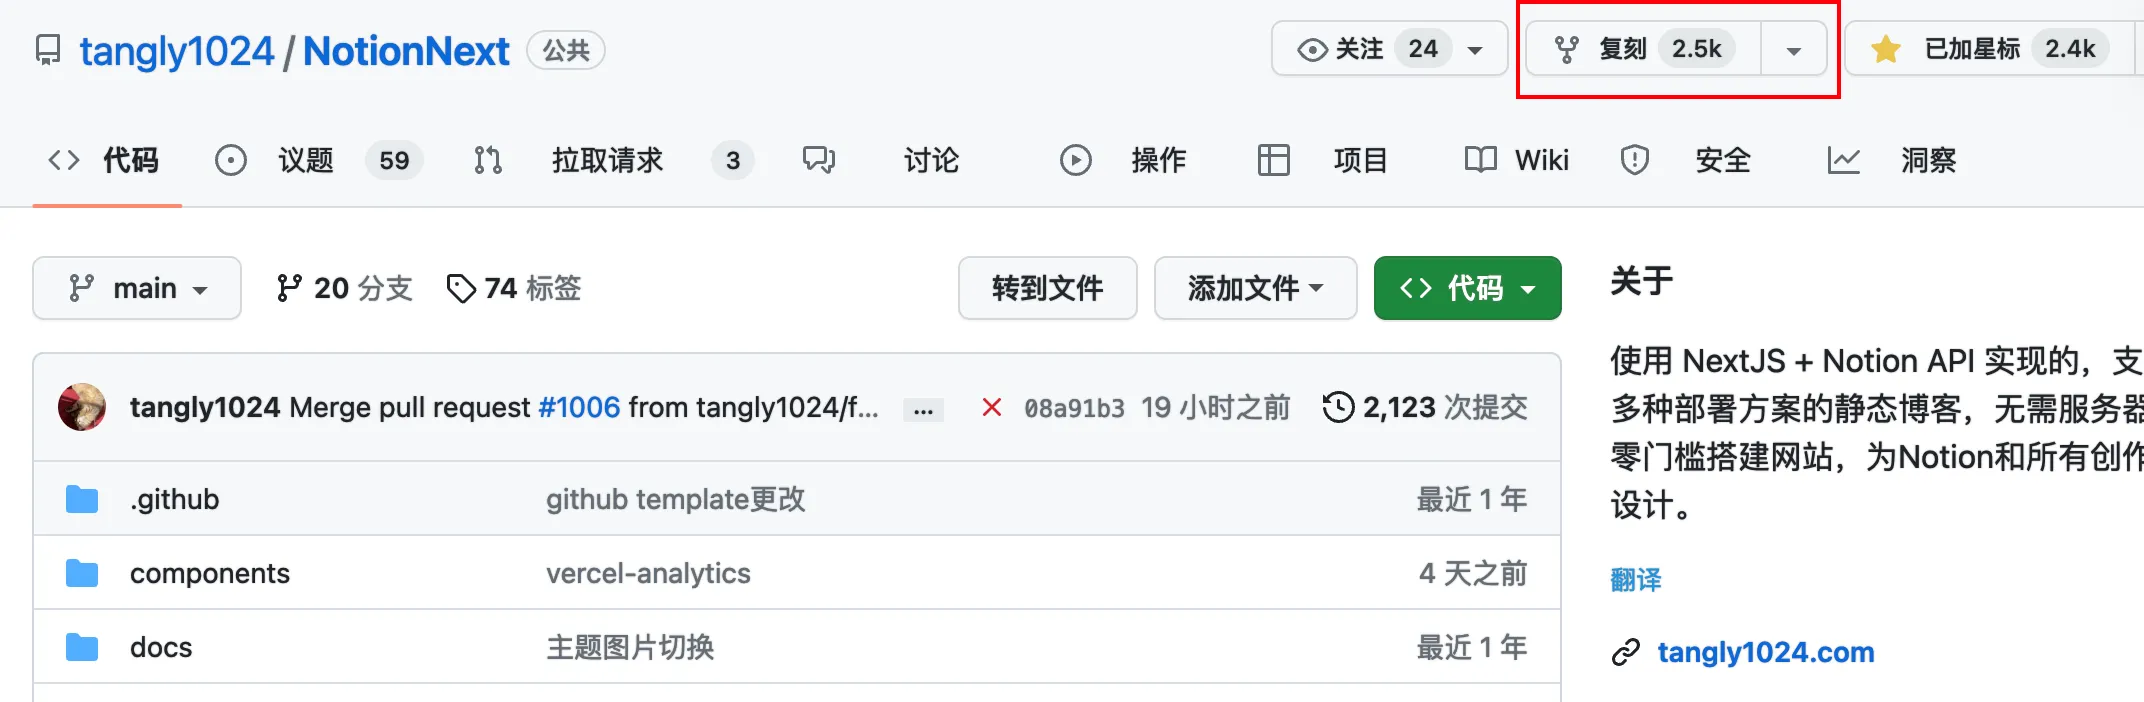
https://github.com/tangly1024/NotionNext
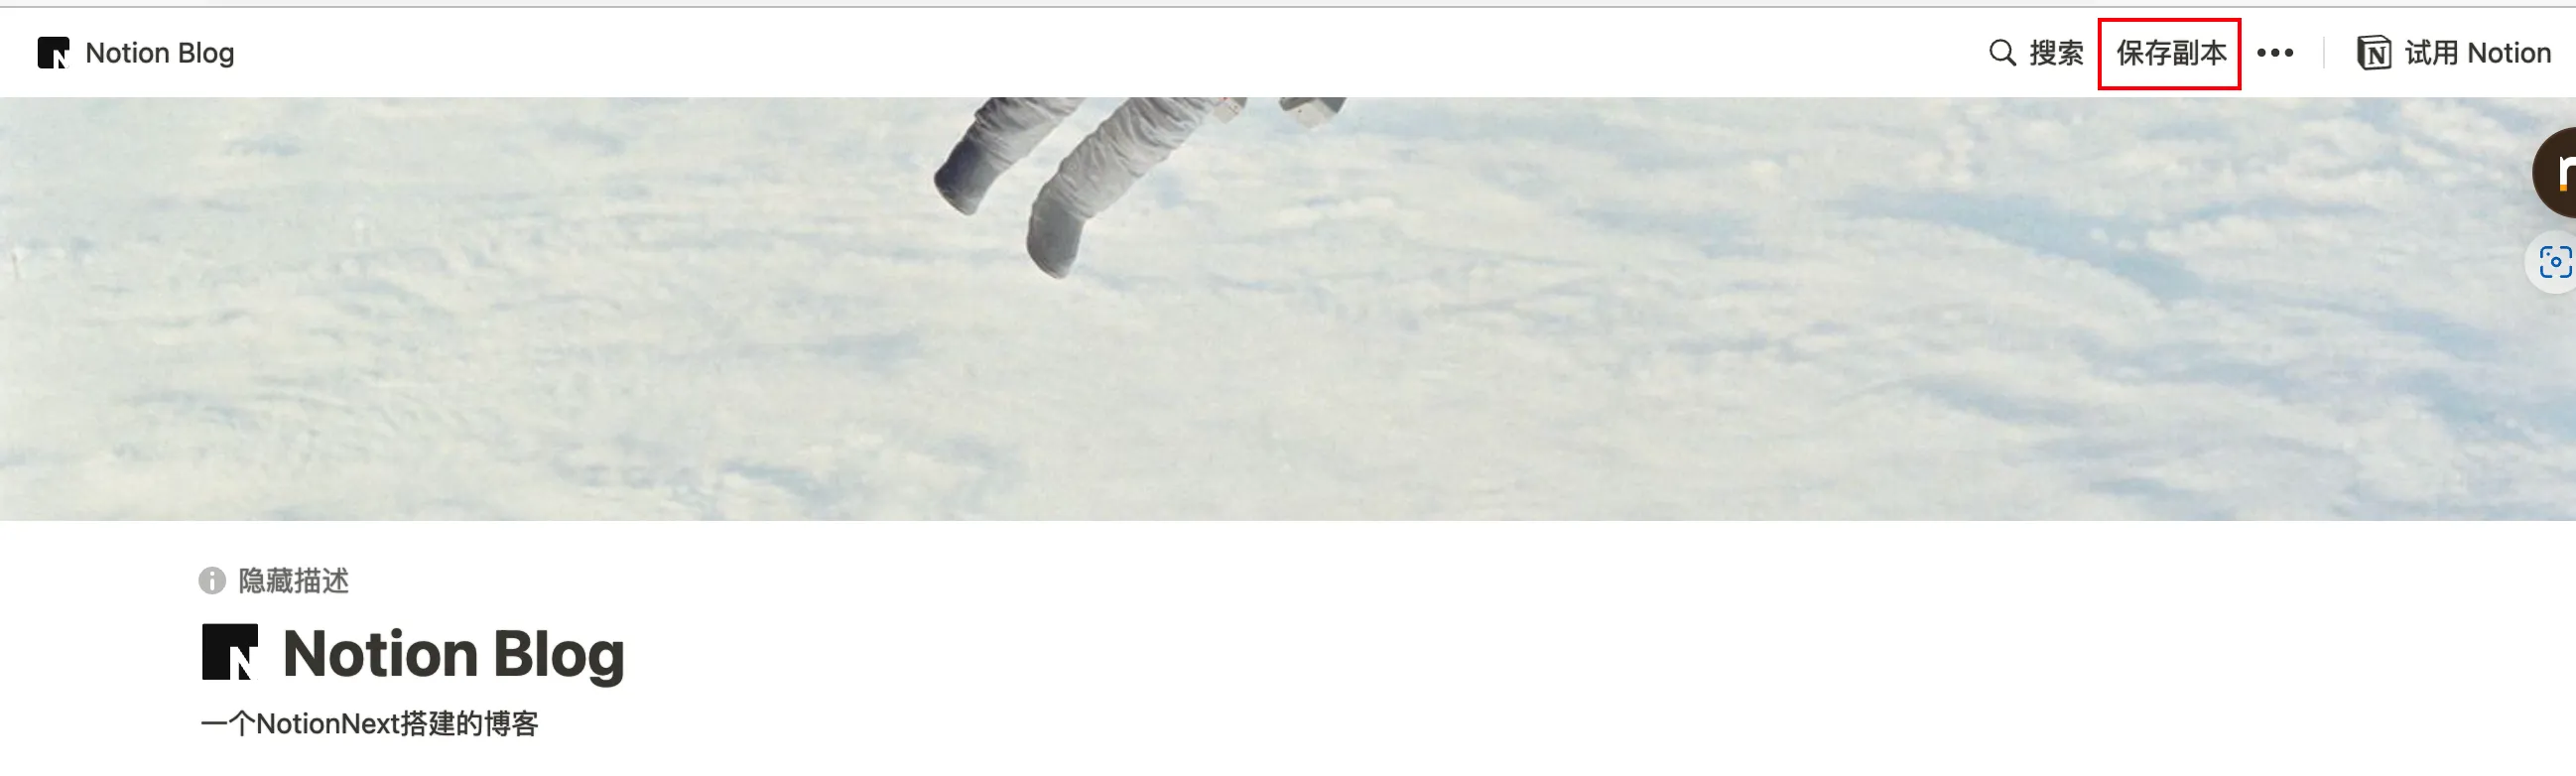
2. Duplicate the Notion Template#
Go to the template page below, click the “Duplicate” button, and save the page to your own Notion.
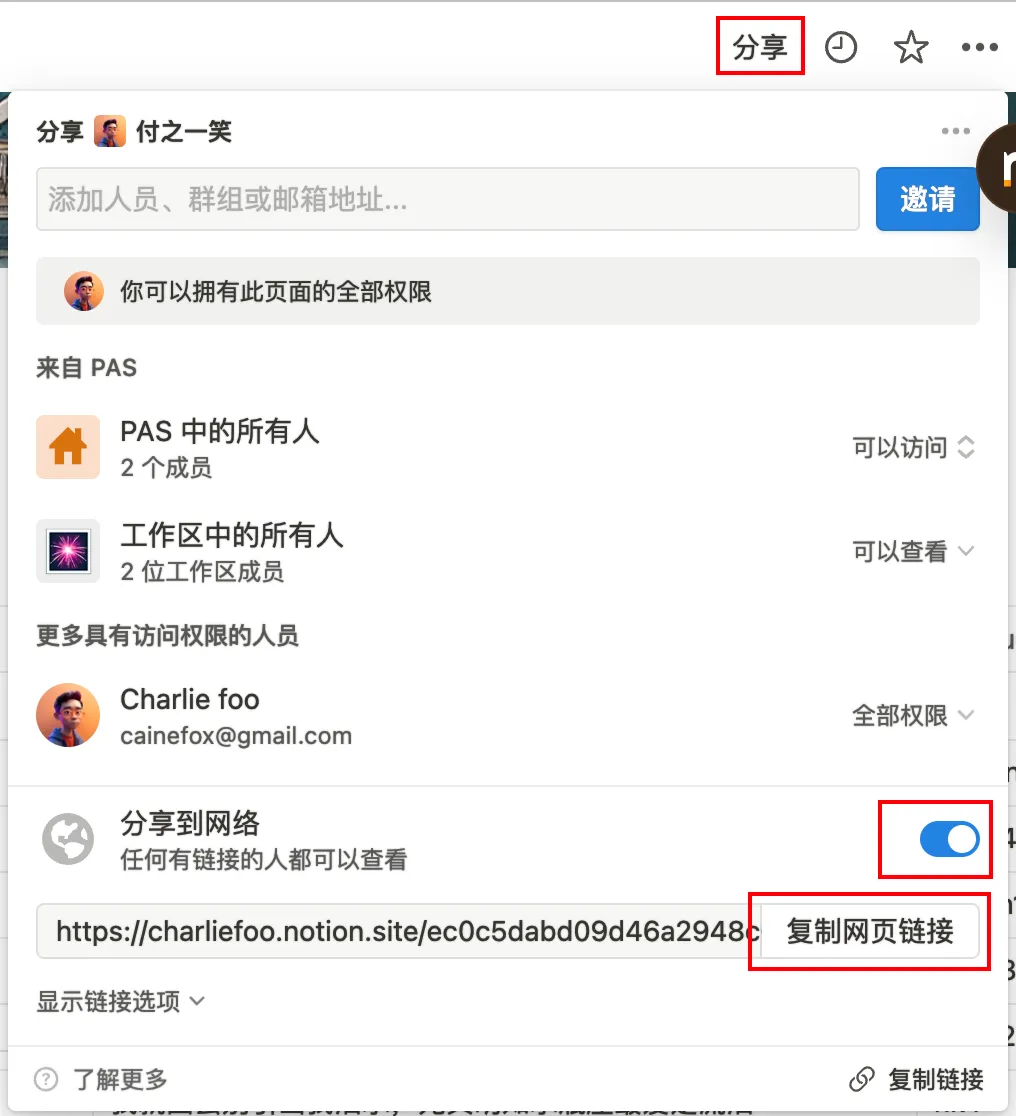
In the top-right corner of the saved page, click the “Share” button, enable “Share to web,” and copy the web link into your browser’s address bar.
Find the Page ID in the browser’s address bar, as shown in the image below:

This image is copied from the official tutorial.
Start Deployment#
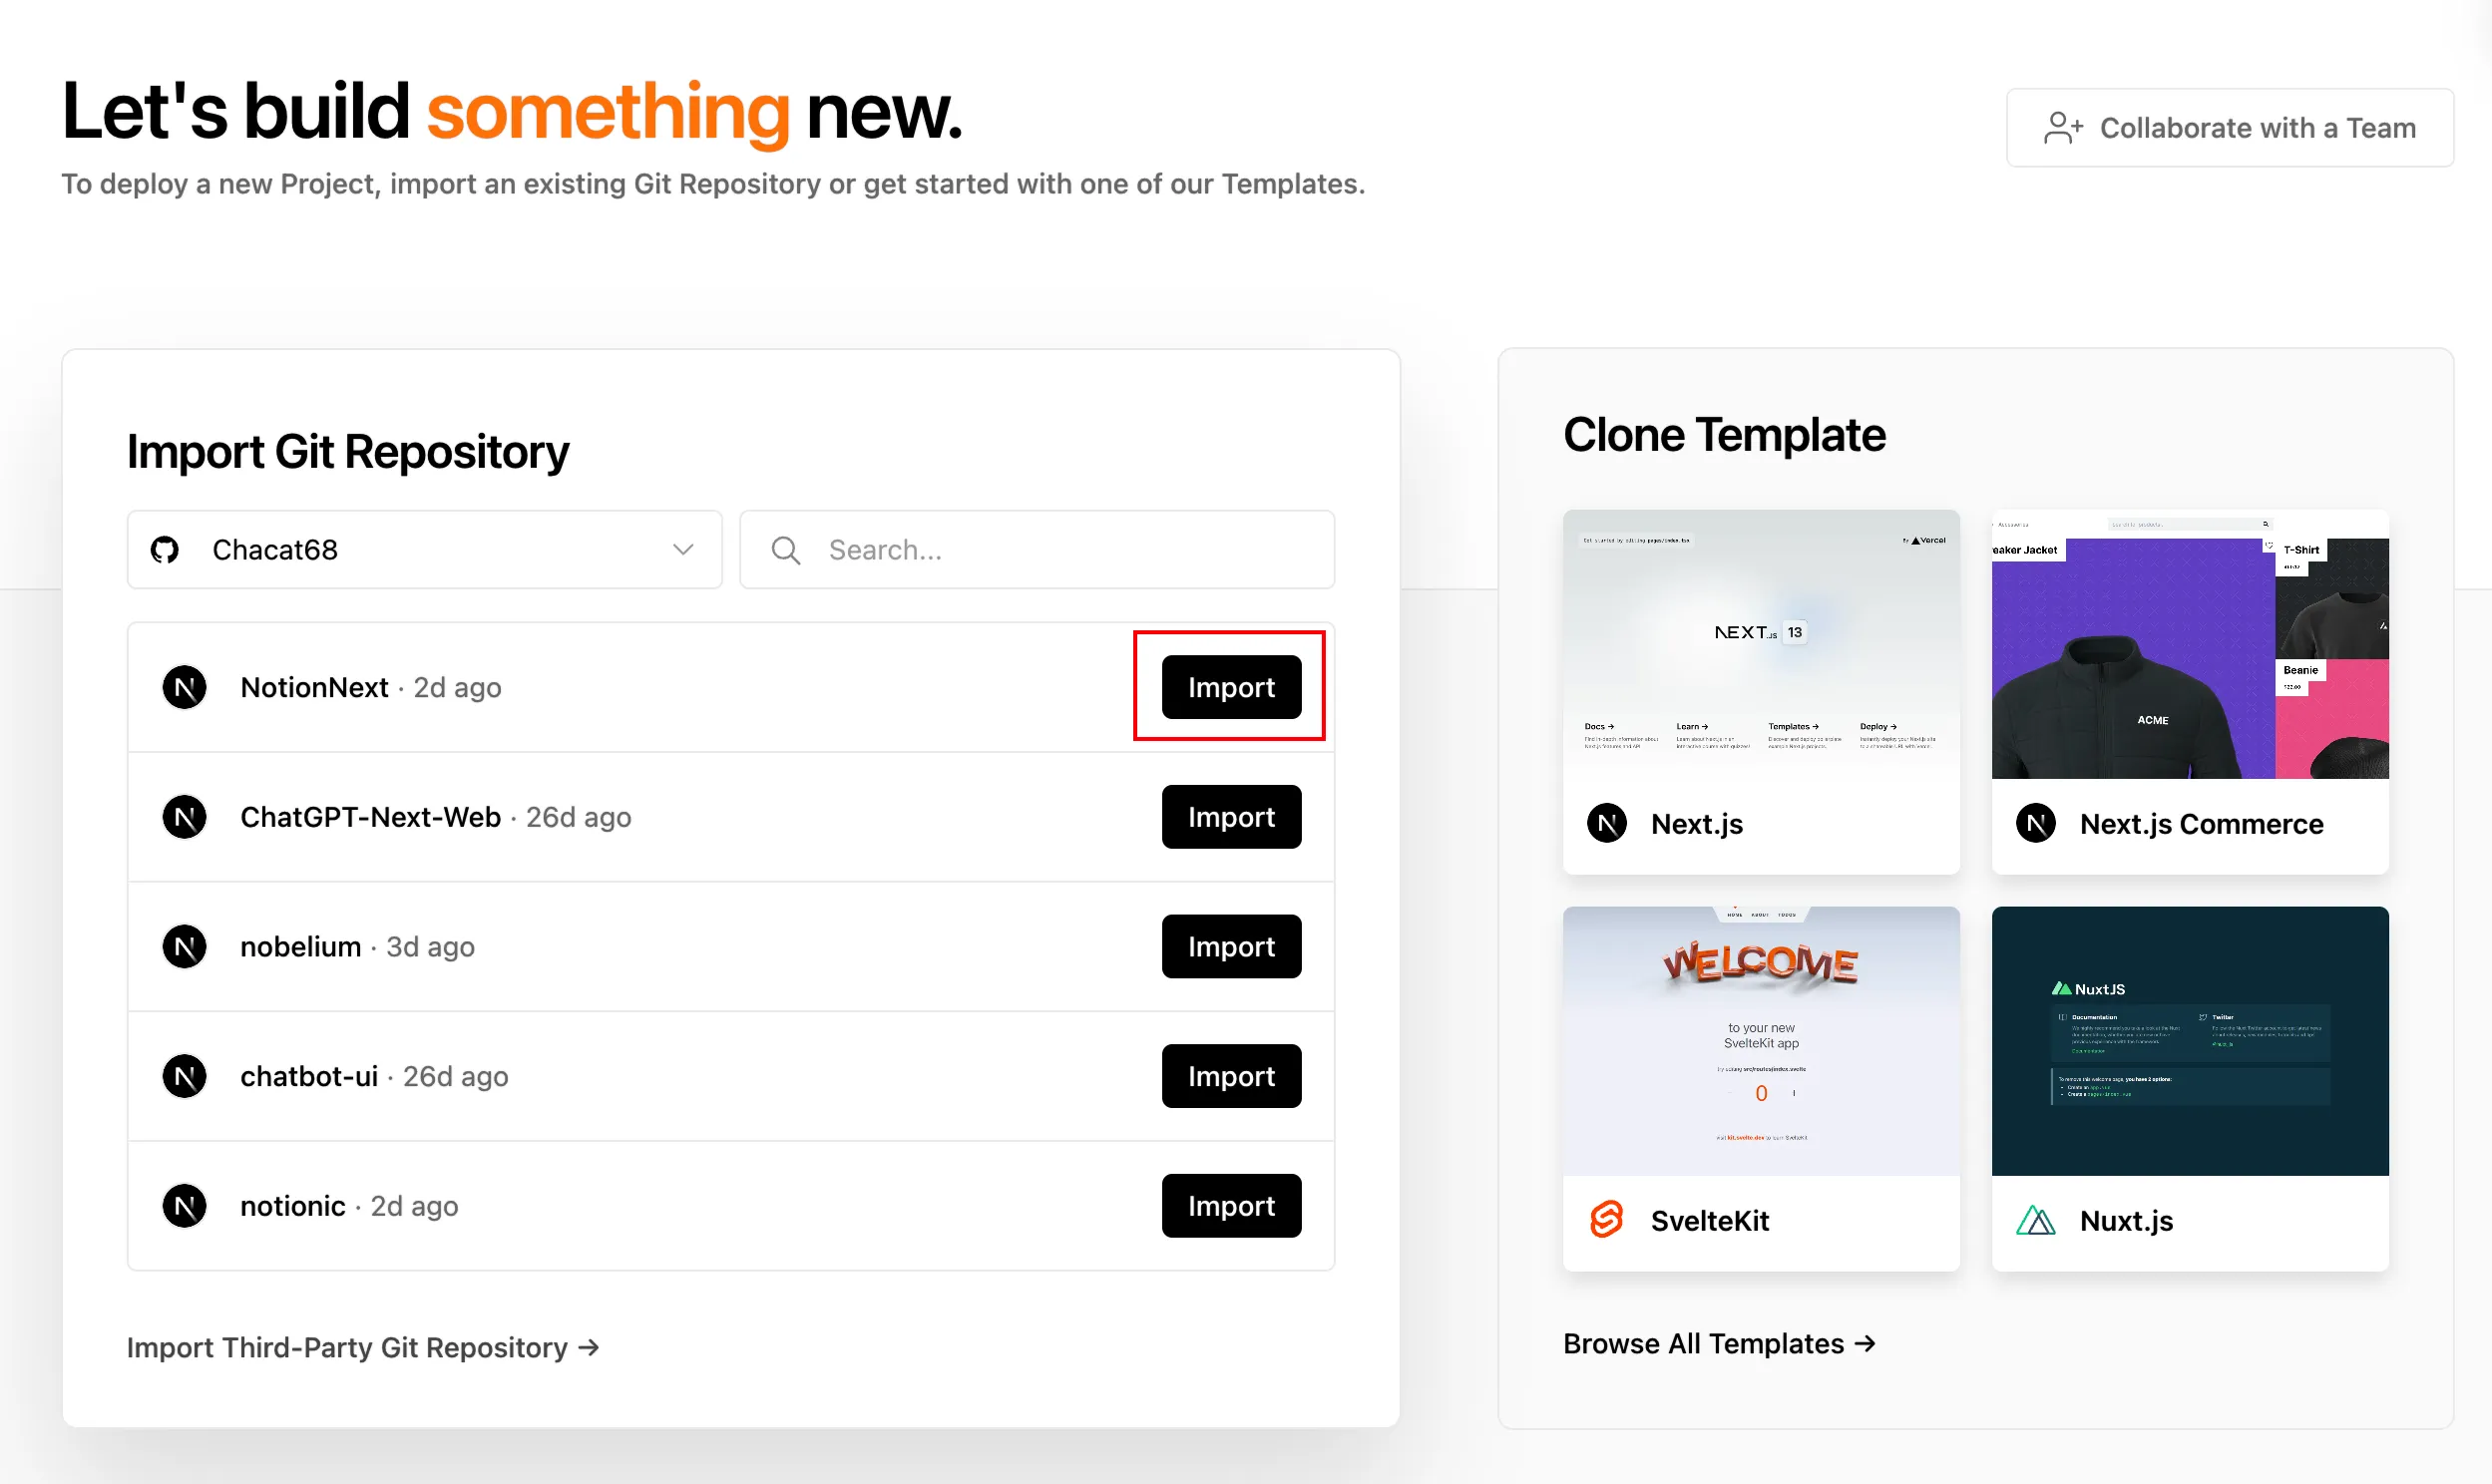
After Github finishes forking, go to Vercel and add a new project.
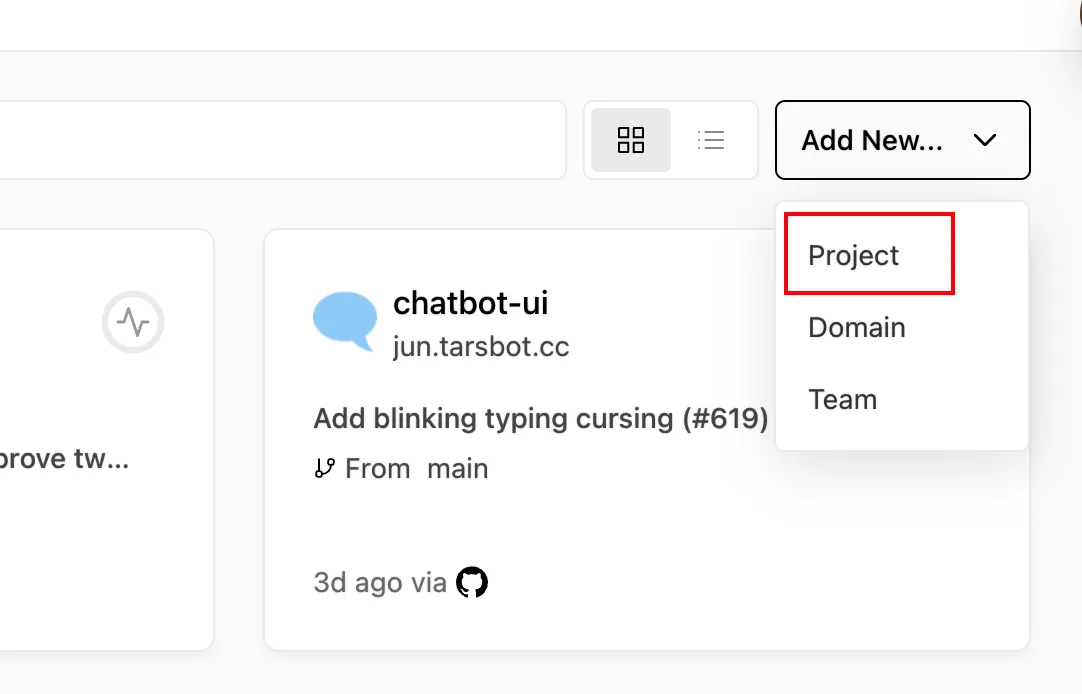
Find the NotionNext project and click the “Import” button to deploy.
Click on “Environment Variables” and add a variable named NOTION_PAGE_ID with the value being the Page ID obtained in the first step.
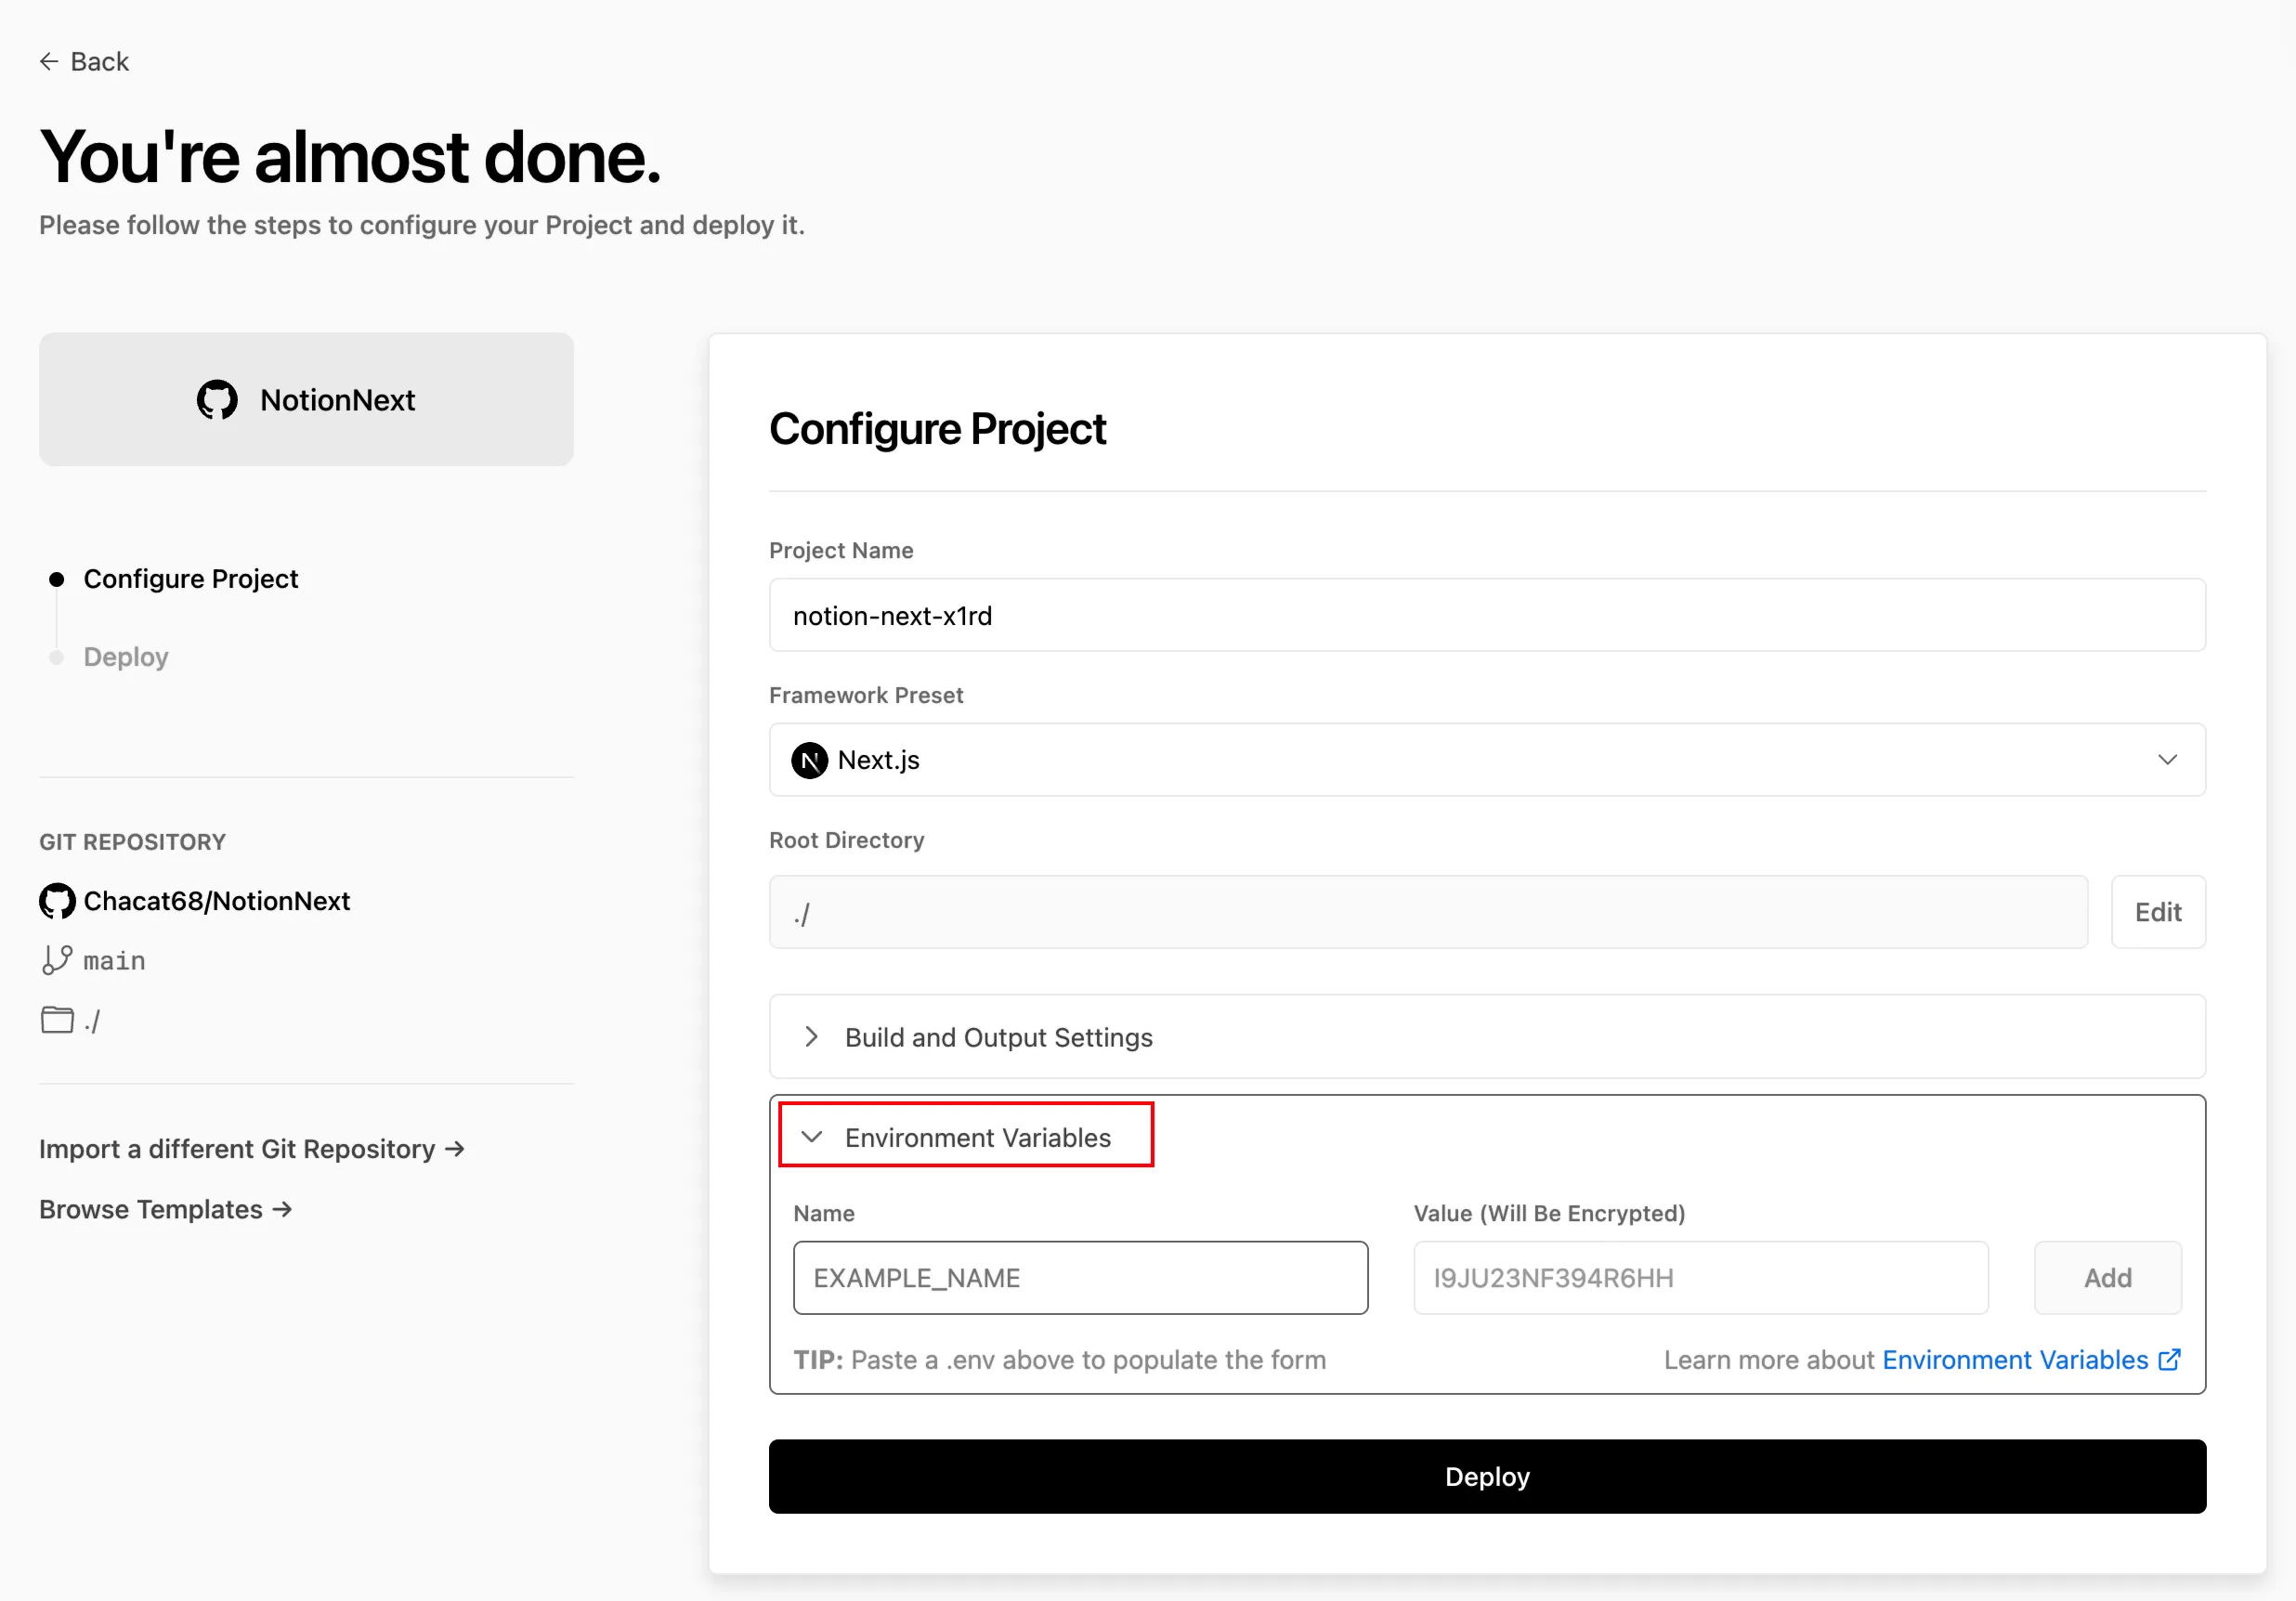
Paste the Page ID from the preparation step into the “Value” field and click “Deploy” to start the deployment.
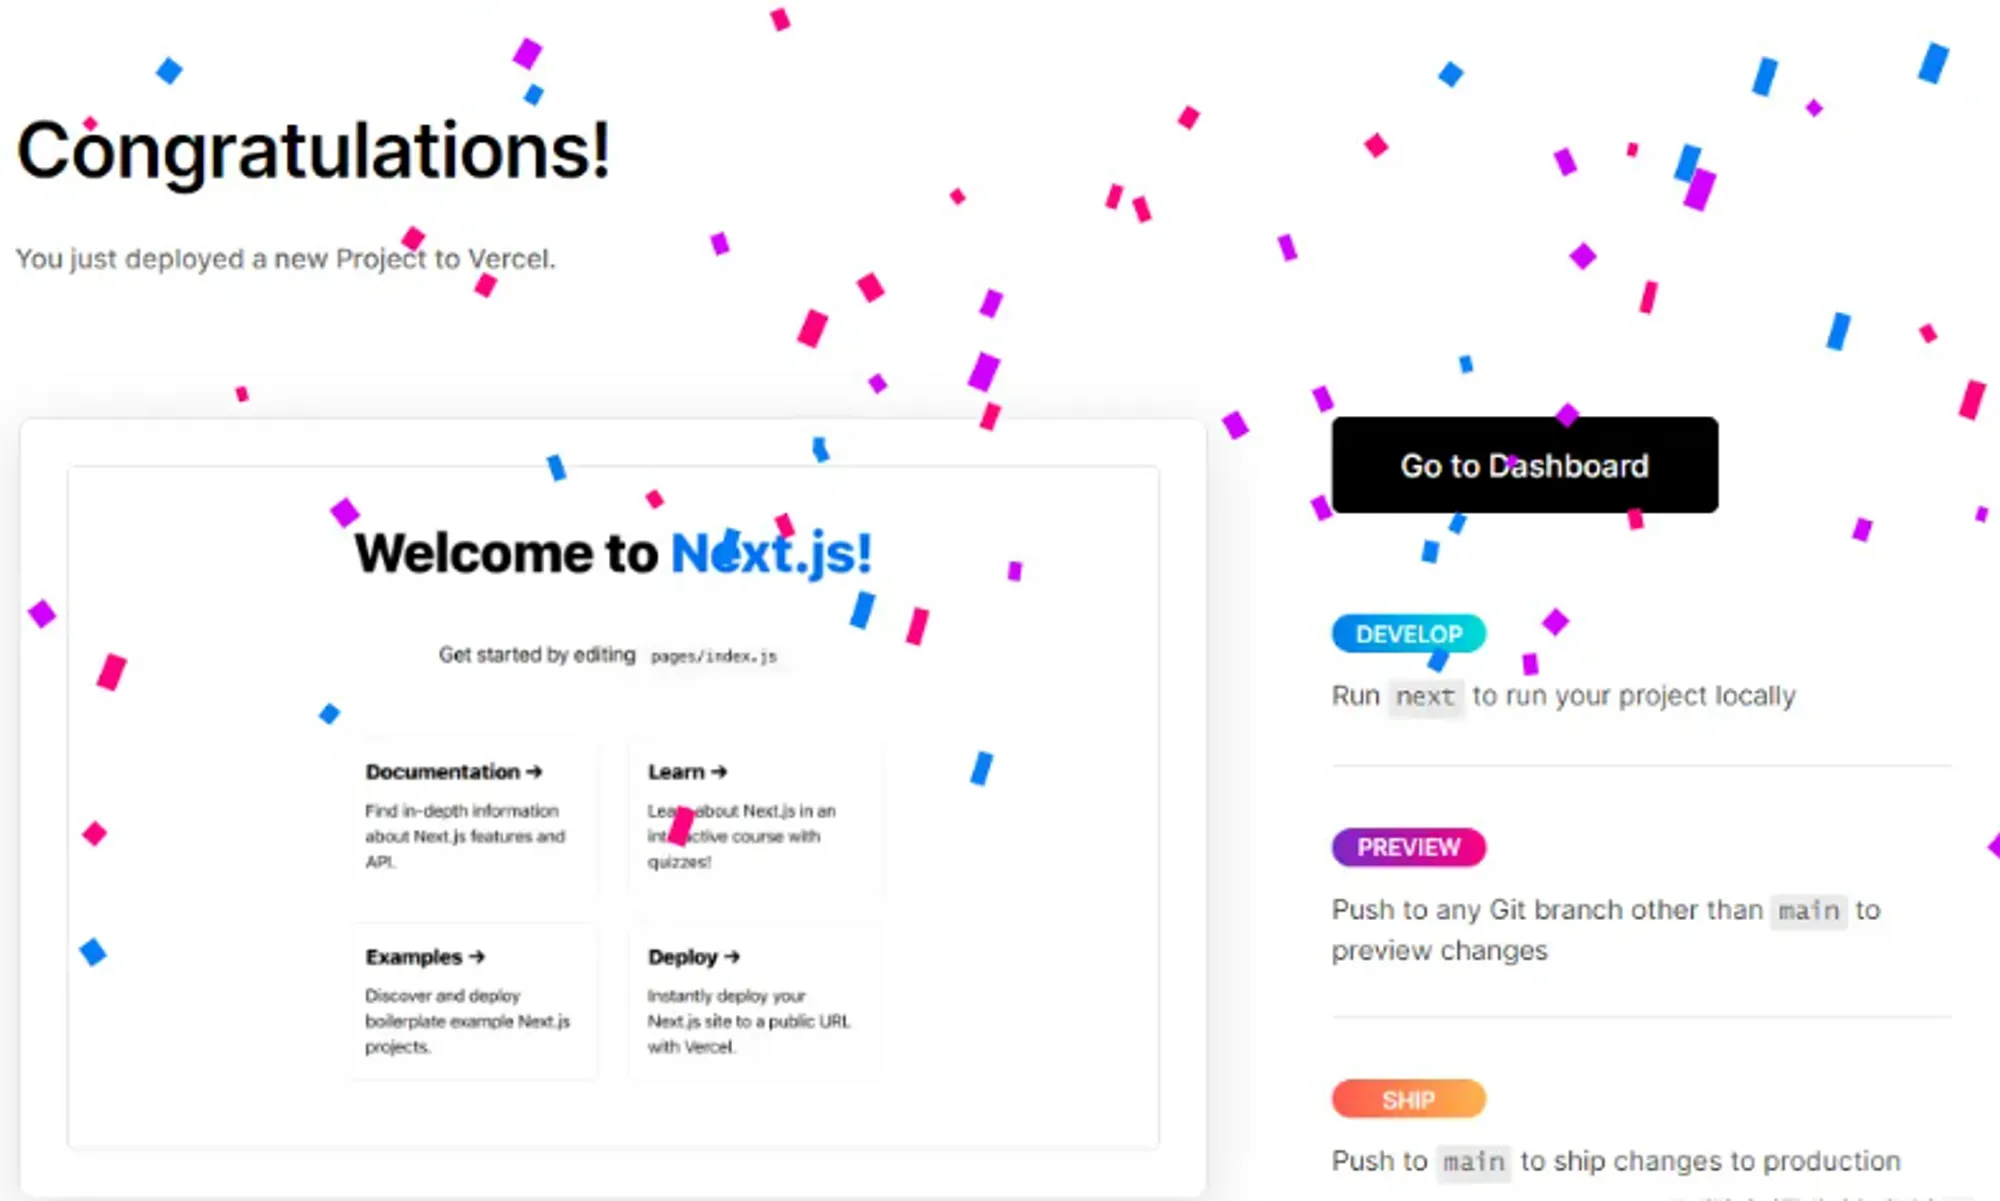
Deployment Complete#
When this page appears, the deployment is complete. Click “Go to Dashboard” to access the website’s control panel.
Other Configurations#
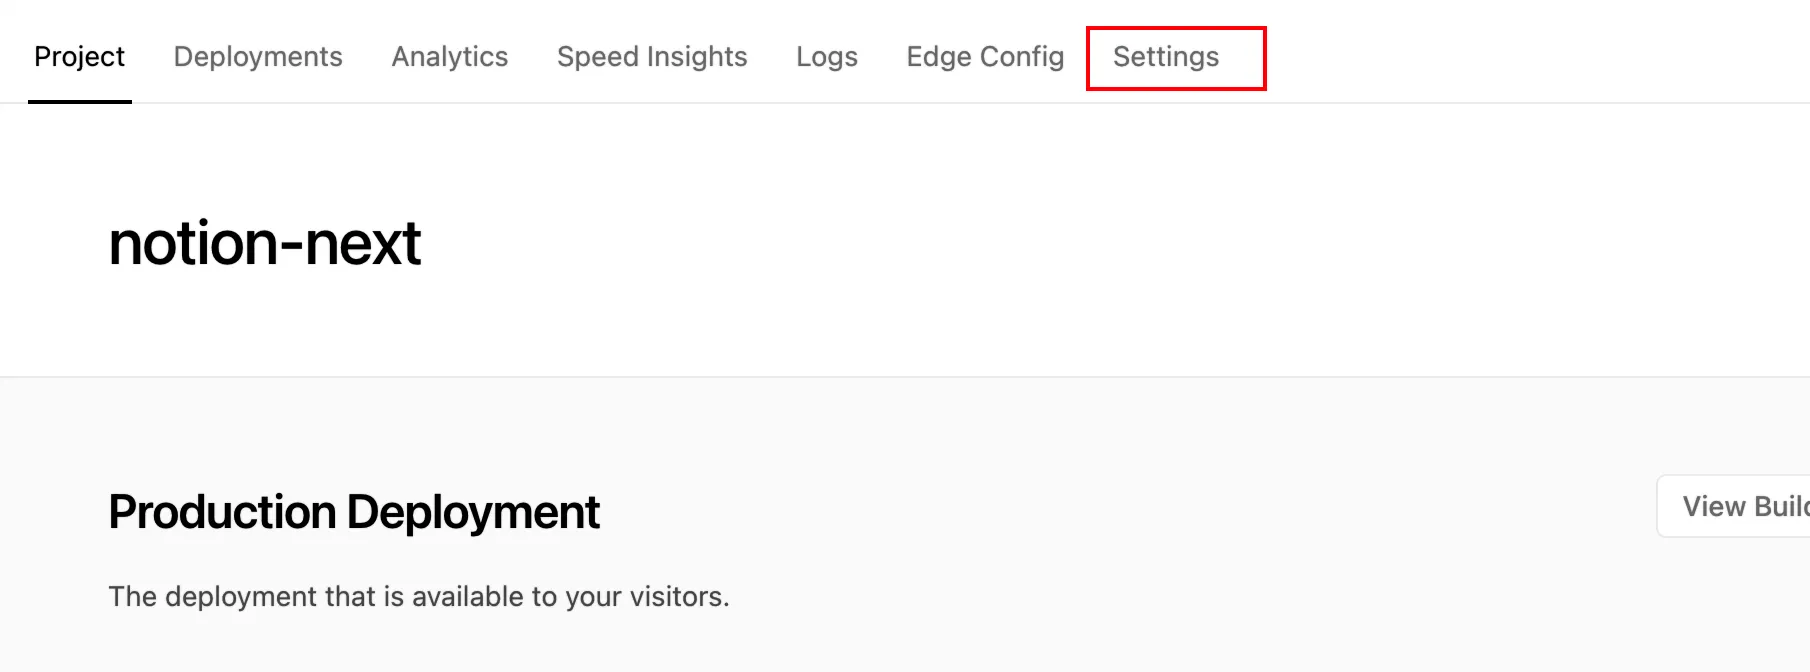
Domain Binding#
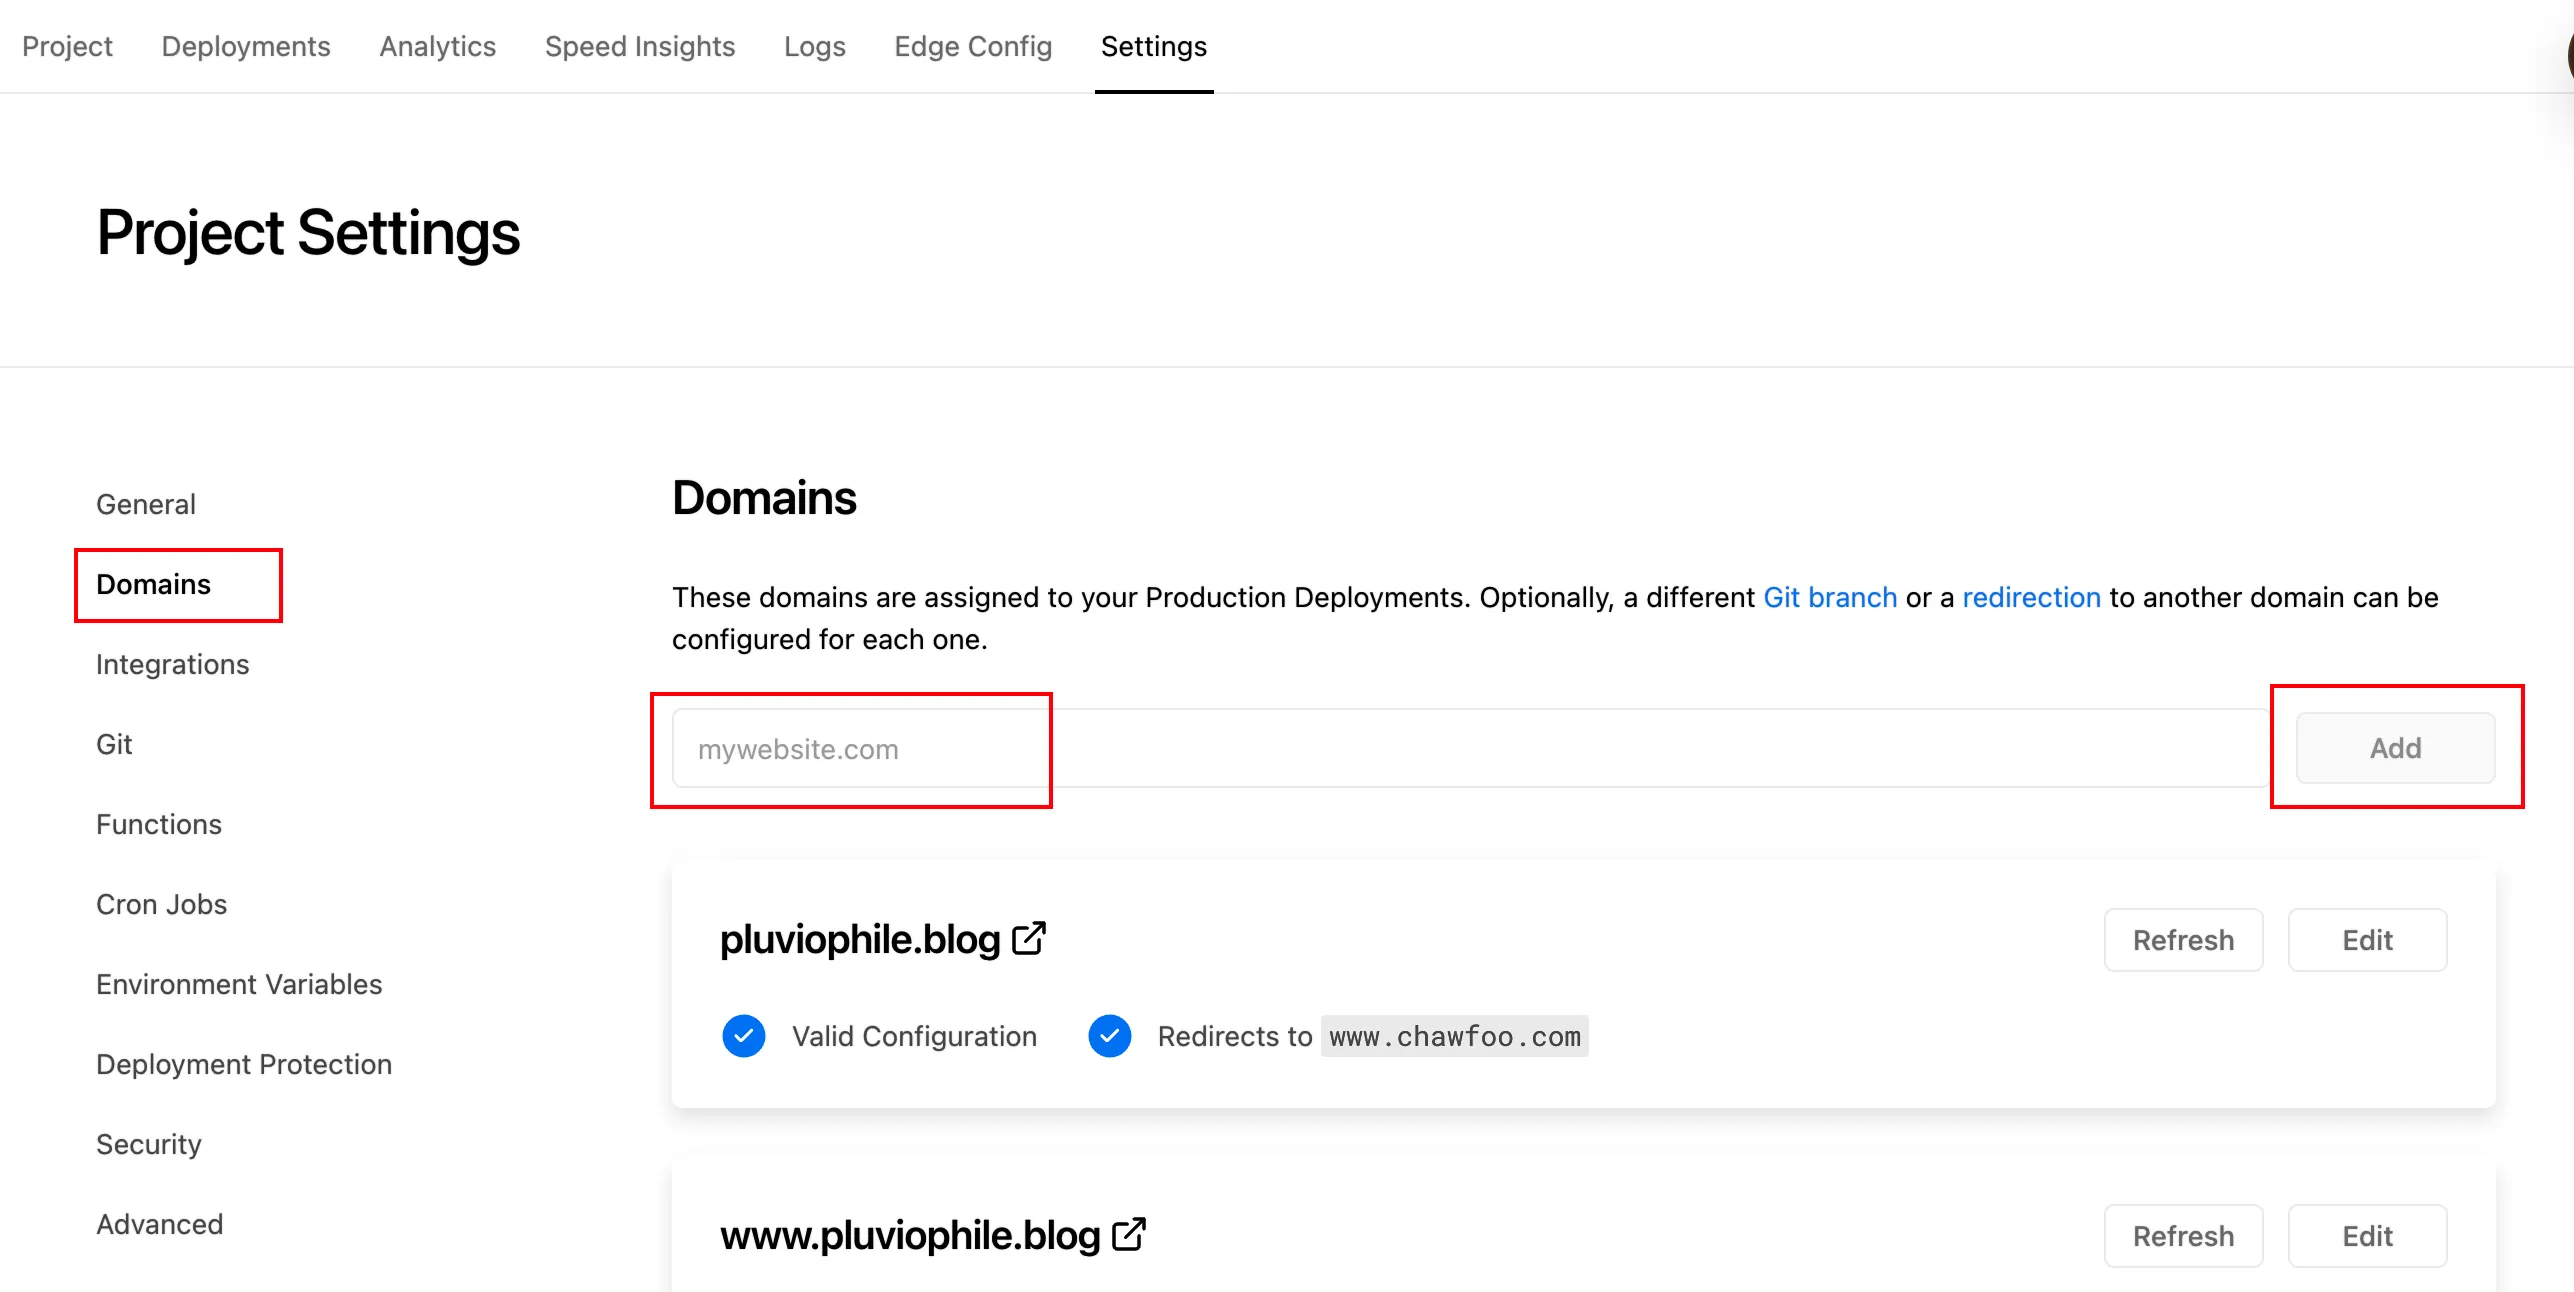
On the website’s control panel page, find the “Settings” page.
Switch to the “Domains” tab, enter your domain, and click the “Add” button. After successful addition, the required IP and server for DNS resolution will appear. Go to your domain management page and set up the DNS records to point to the specified address. Once all configurations are done, wait patiently for the DNS to propagate. Propagation typically takes up to 24 hours, with speed varying.
All steps are now complete, and you can quickly access your own blog!
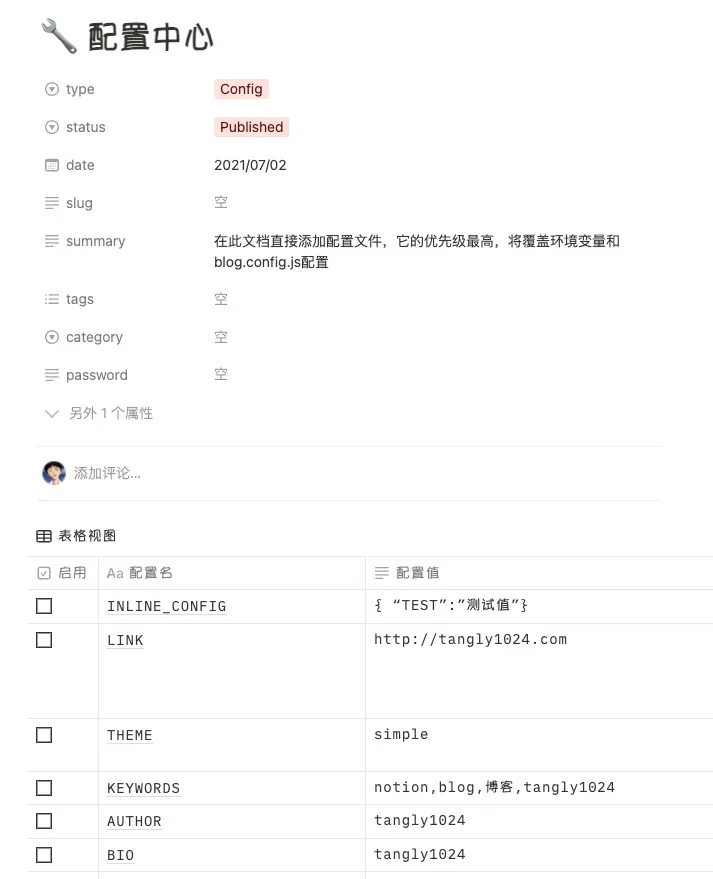
Configuration Center (Updated June 6th)#
If your version is V4.1.0 or later, it supports this configuration page. Some basic website settings can be modified directly here, unlike before when you had to edit blog.config.js for them to take effect.

Create a new page, go to the template webpage, and copy all the configuration parameters from the template page over!
Update (2024/11/30)#
For project updates, it is recommended to fork the original project and then create a new branch in your own project for update operations. This way, if conflicts arise during future updates, they won’t affect the main project, and only the website project will be modified. You can also create multiple branches to manage multiple websites.
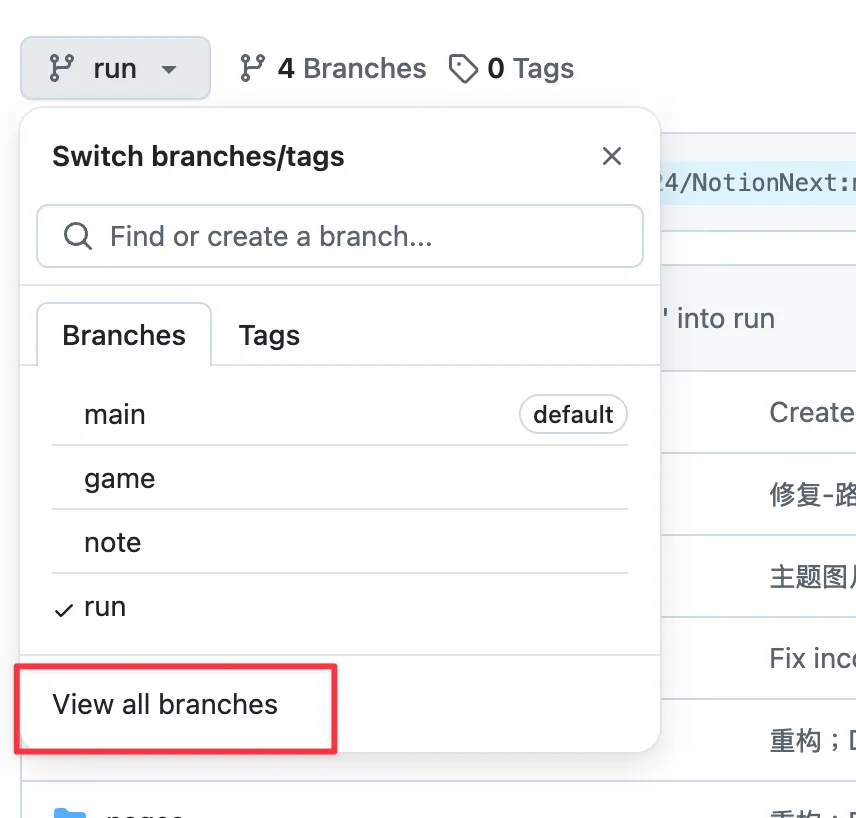
Create a New Branch#
In the original project, create a new branch. Click “View all branches” to enter the branch management interface.
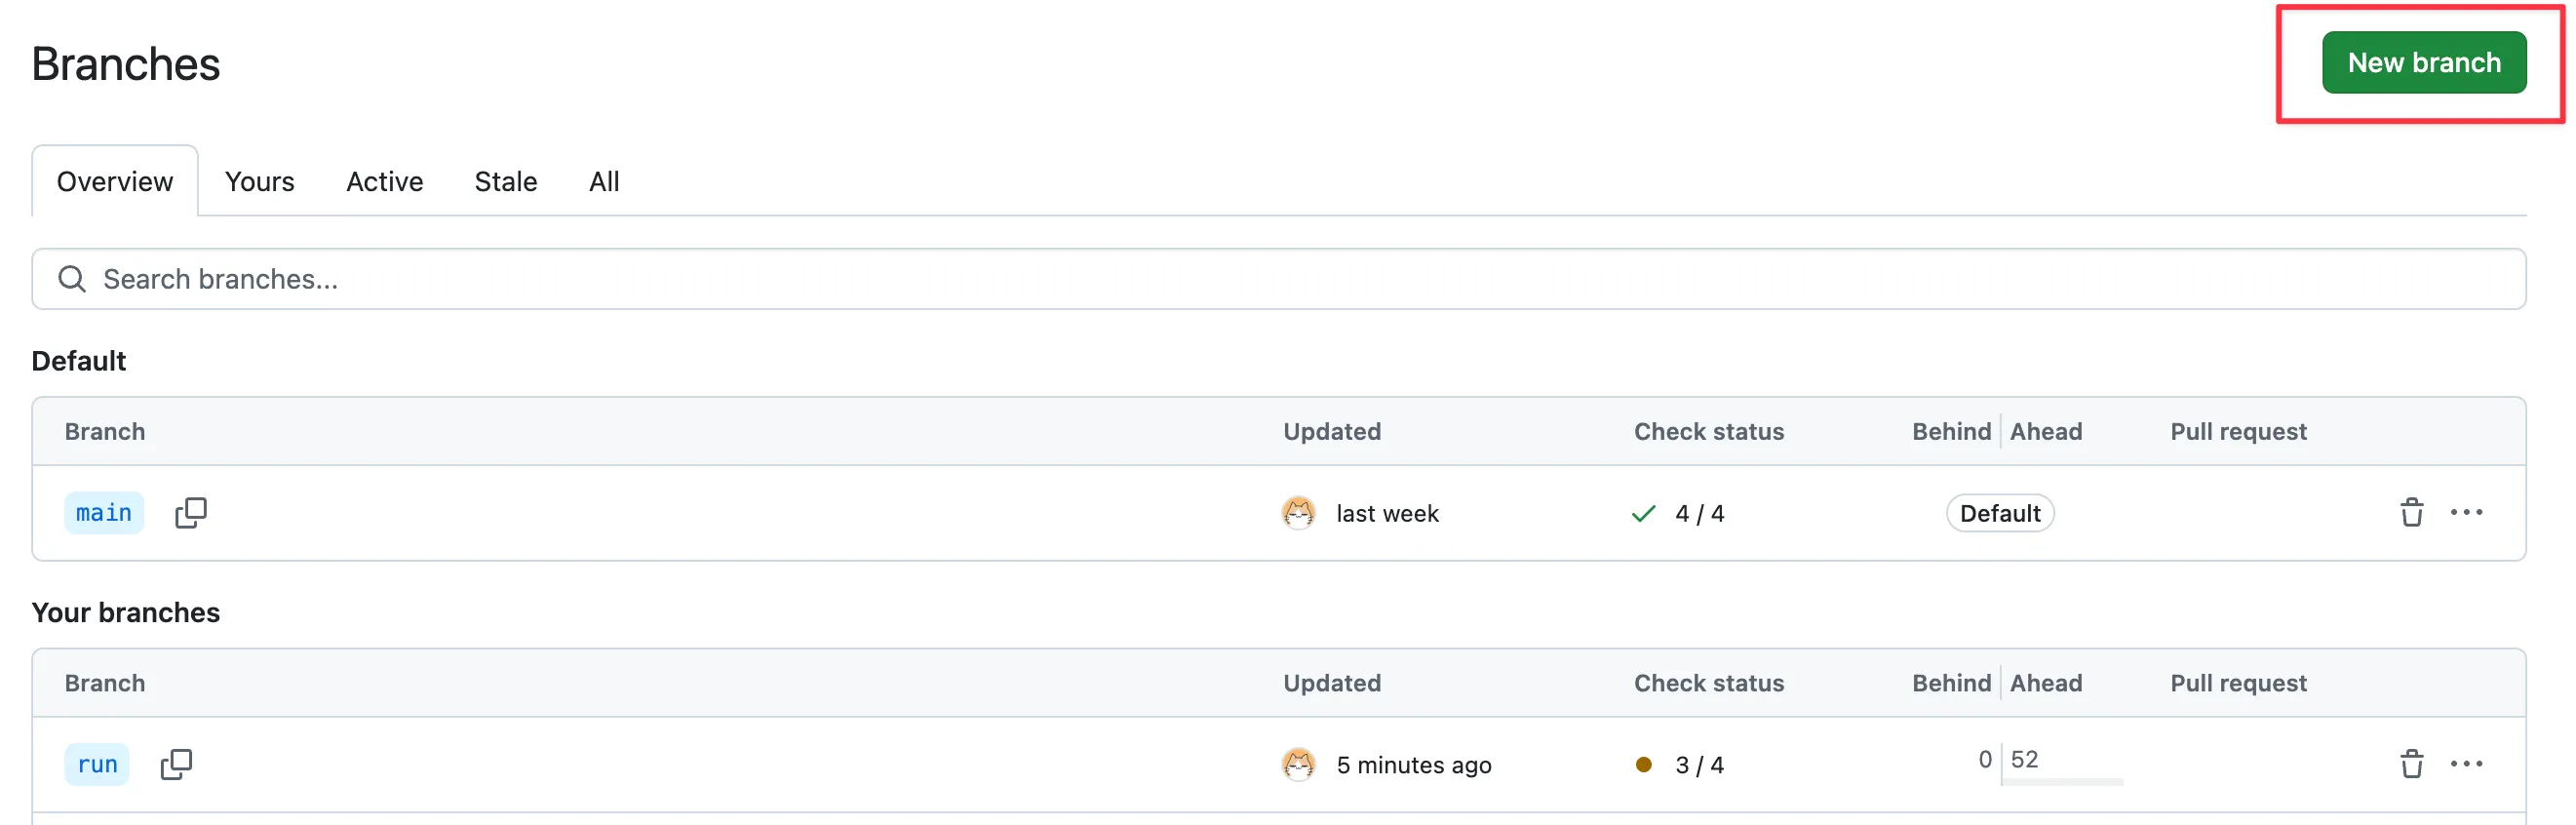
After entering the branch management interface, click the “New branch” button, enter the branch name, and the branch will be successfully created.
Version Update#
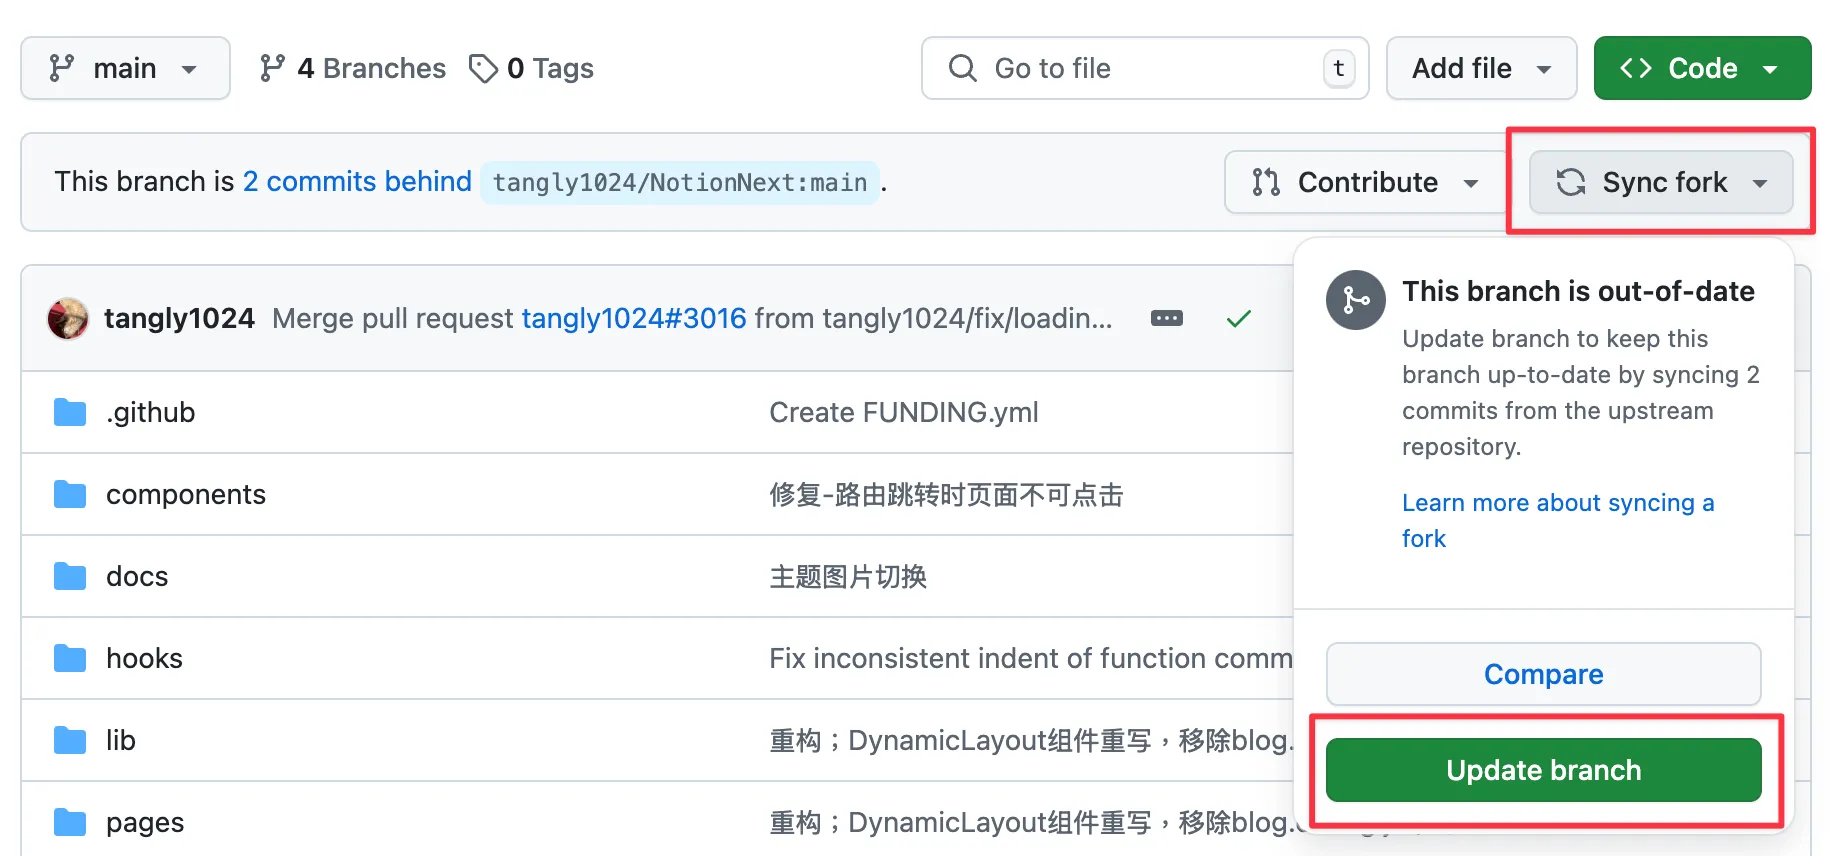
When there is an update in the upstream project, you will see a notification on Github (e.g., “2 commits behind”). You can then click the “Sync fork” button, followed by the “Update branch” button, to automatically update with the upstream version’s content.
After clicking update, you can see the compilation process for this update in the Vercel backend. Wait for the compilation to complete.
💡 Thank you for reading! Feel free to share this article or reach out to me via email to discuss.
The RSS feed address for this site has been updated. Please resubscribe, dear readers!